Date: Mon, 21 Jan 2002 14:27:30 -0500
Here are a few pictures of us doing the valve
shim maintenance on the wrecked 800 that
we are rebuilding. The bike had 30,000 miles
on it. The valves were way too tight and needed
to have thinner shims put in. I hope the pictures
help any of you that wanted to do the job yourself
but the thought of tearing the top off your engine
made you a little nervous.
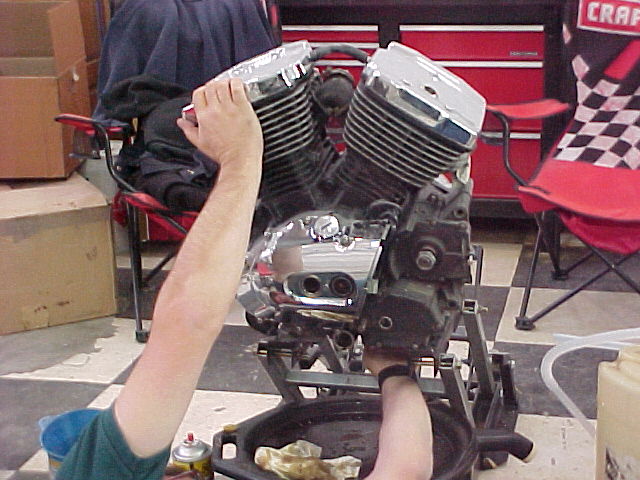
Picture #1: Having the engine out of the
frame sure makes it EZ to check the shims
but is not required!!!
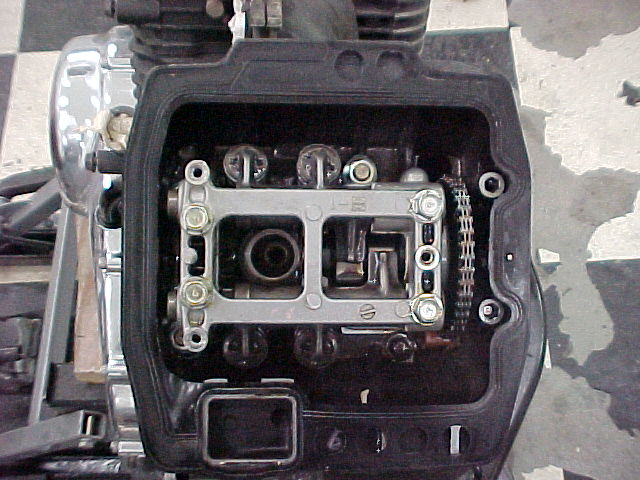
Picture #2: This is what it looks like when you
take the chrome valve covers off the top of
the 800's engine.
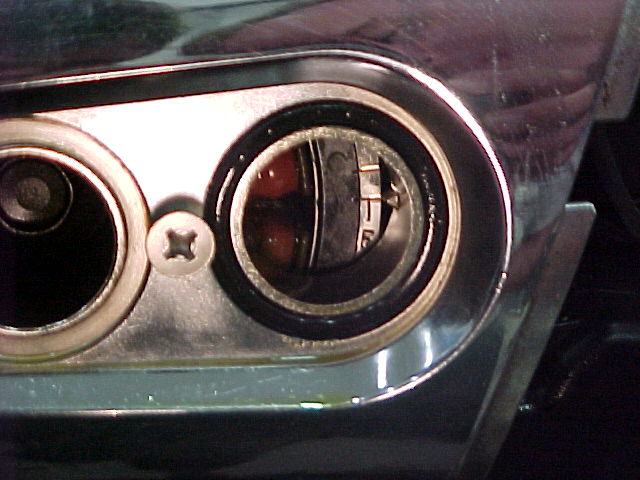
Picture#3: First thing you have to do is to
get the engine to top dead center. (TDC)
There are marks on the crankshaft to tell you
TDC for the front cylinder then another mark
305 degrees later for the rear cylinder. The mark
you are looking for looks like the top of a letter "T".
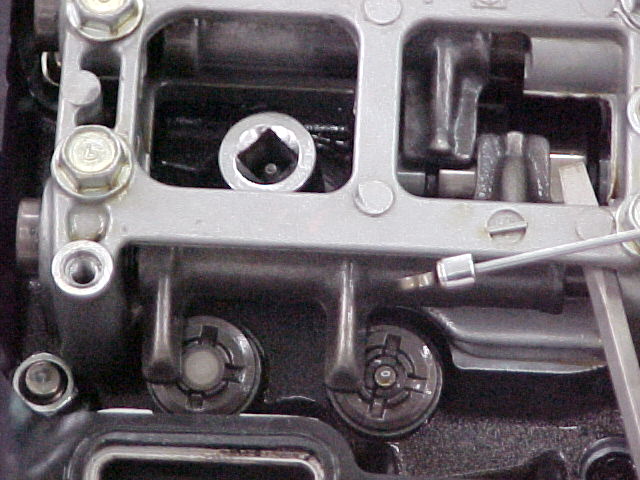
Picture#4: The way you can tell you have the right
mark is by looking at the camshaft gear. There is
a line scribed on it that should be perfectly level
with the top of the head.
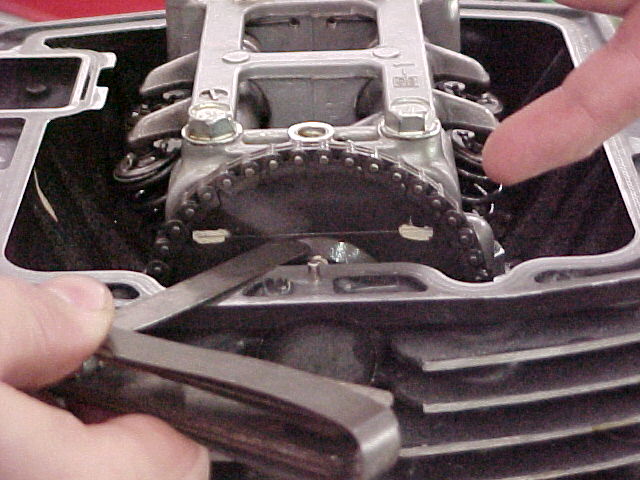
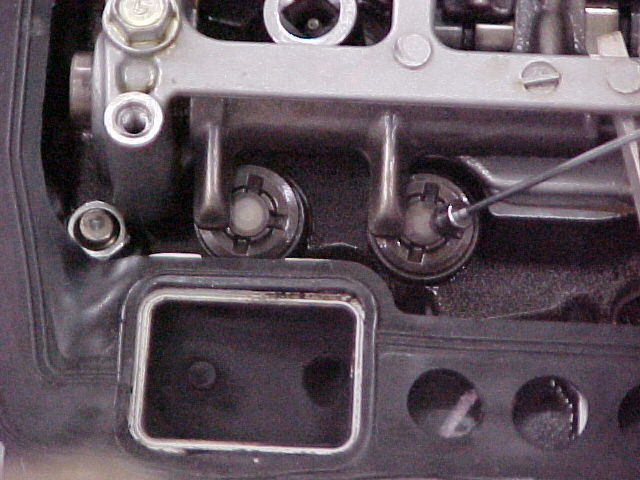
Picture#5: Use a magnetic tool to pull out the shims.
They are very slick and you may lose one down in
the engine if you drop it. The shims sit on top of the
valve stem. You have to use a screwdriver to move the
rocker arm assembly over to get to the shim.
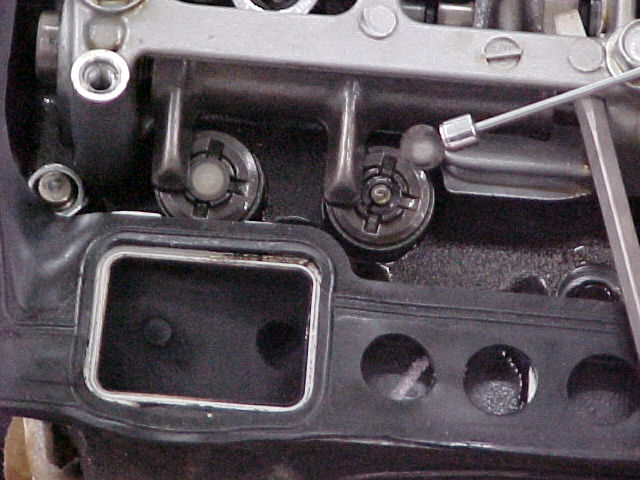
Picture#5,6: Use the magnetic tool to pull the shim out
then let the rocker assembly go back into place. the rocker
arm assembly is spring loaded so it will slide right back.
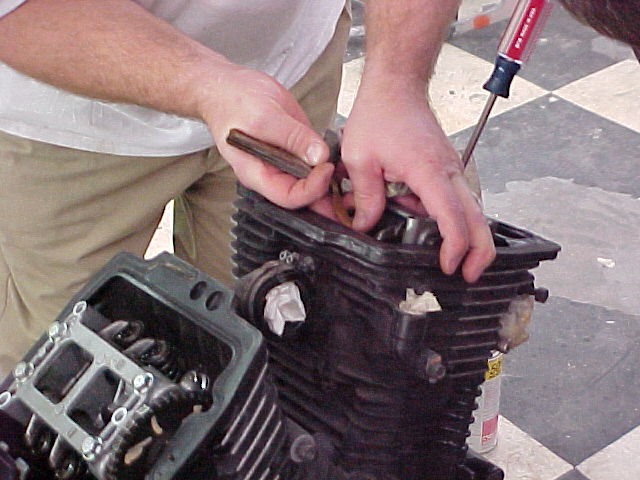
Picture #7: Using a feeler gauge, slide it under the rocker arm
and check the clearance. The intake valves need to be checked
with a .010 to .015 feeler gauge. This is the acceptable range.
I used the .010 to start with. On this engine I couldn't even get
the gauge under the rocker at all unless I forced it. The gauge should
slide under there with little effort. The exhaust valve should be
checked with a .025 to .030 gauge. This is the acceptable range
on the exhaust valves.
Do yourself a favor and get a repair manual. There are charts in
the book that tell you what size shim to try next if your clearance
is not correct. Some of it is guess work. Our engine was so far
out of spec that we had to try several different sizes thinner to
even be able to get the feeler gauge under the rocker arm. We
were lucky and just happened to have a "spare" engine on the
bench to rob different sized shims out of to try in this engine. If
it weren't for that this would have taken a lot longer.
I hope these pictures help someone. Sometimes being able to
"see" what is involved makes it a lot less intimidating. If you have
any questions or need any help don't hesitate to call me or Scooter.
I think we could do this blind folded now!!!
"Ez"
VROC#288
800 valve 7.jpg
800 valve2.jpg
800 valve 8.jpg
800 valve1.jpg
800 valve4.jpg
800 valve5.jpg
800 valve6.jpg
800valve3.jpg